All About the Trails Cowl Pattern
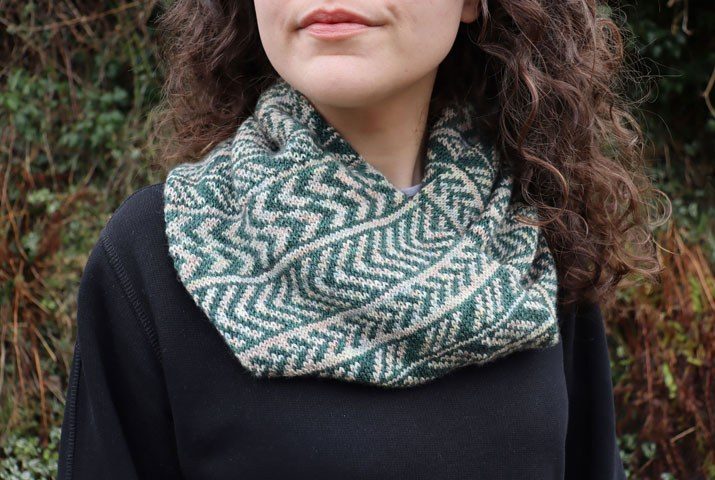
I recently released the Trails Cowl pattern. With textured stripes of garter stitch and slipped stitches, this cowl is an easy but engaging project to work on.
I’d been wanting to design a cowl in this shape for a number of months when I finally made a start on this project. I find this style of cowl really easy to wear tucked into coats in winter, as it’s similar to wearing a shawl, but is much quicker to put on, which is very useful if you’re in a hurry. I’d decided early on when thinking about this project that I wanted the cowl to have a textured stitch pattern, but was struggling to decide exactly which stitch pattern I wanted to use. I also wanted to use two colours for this project, however I knew I didn’t want to include any stranded colourwork and would either use mosaic knitting or stripes.
When I started working on this project I already knew what yarn I wanted to use. For my birthday I’d been given a skein of fingering weight yarn from Pigment & Ply in the colour ‘Rainstorm Over the Sea’, a couple of months later I’d then purchased another skein in the colour ‘Midnight & Myrrh’ to accompany it in a project. At the time I hadn’t known exactly what project I wanted to use these two colours for, but when I started thinking about this cowl idea I quickly decided these colours would be perfect for it.


I initially started this project by knitting lots of swatches to experiment with stitch patterns I could potentially use for this cowl. I knitted these in a single colour, as I wanted to get the texture right before I started experimenting with how I wanted to use the two colours together. I spent a few days experimenting with swatches and had quite a difficult time finding a stitch pattern I was happy with. I ended up working on other projects for a little while before returning to this one to have a fresh attempt at swatching. Thankfully when I knitted the second batch of swatches I managed to find a stitch pattern I thought would be perfect for this project.
Once I’d chosen a stitch pattern I could start experimenting with how I wanted to use the two colours I’d selected for this project. I decided that stripes would work best for the stitch pattern I was using and began knitting swatches with different thicknesses of stripes. I had thought that thinner stripes would look better, but in the swatches I found that this made the stitch pattern more difficult to see. I ended up deciding to use thicker stripes, with each stripe ending when the position of the slipped stitch column changes.

Now that I’d decided on the main elements of my design I was able to knit and block a gauge swatch that I could then use to write the pattern. I also had to knit further swatches to make decisions about things like the type of increases I would use. After lots of swatch knitting I was finally ready to start knitting the cowl, however it unfortunately didn’t all go to plan. When I finished my cowl and tried it on I really wasn’t happy with how it was looking. I found that the fabric wasn’t rigid enough, so it wouldn’t stay up around my neck as I’d pictured. At this point I considered abandoning the project, but I still really liked it and wanted to get it right. I decided that gauge was the issue and I’d chosen to use too loose of a gauge for this design, as I hadn’t foreseen this problem at the swatching stage. I knitted a few more swatches using different needle sizes, before unravelling the cowl and starting the project again with a smaller needle size.
Thankfully my second version of the cowl was exactly as I’d pictured, so I was glad I’d persevered and tried again in a different needle size. I think we often think of gauge as only being important for sizing, but this project really showed how it can have a big impact on the overall look of the project. Even though I had to knit this cowl twice I still really enjoyed knitting it, I found the combination of garter stitch and slipped stitches really relaxing to work on. This design has made me want to experiment more with using slipped stitches in future designs, as well as striping colours as I haven’t really used stripes in any of my designs before.
Click the link below to check out the full details of the pattern.